![[Spring] Google Session Login](https://img1.daumcdn.net/thumb/R750x0/?scode=mtistory2&fname=https%3A%2F%2Fblog.kakaocdn.net%2Fdna%2FbCyJ35%2FbtspjVVFgwF%2FAAAAAAAAAAAAAAAAAAAAAAKPzAv8NQsgbOKK4pUzcKZYVilBSfDe4EVkZ-h0T04b%2Fimg.png%3Fcredential%3DyqXZFxpELC7KVnFOS48ylbz2pIh7yKj8%26expires%3D1767193199%26allow_ip%3D%26allow_referer%3D%26signature%3DTO84%252FiwZLHQ7reXqwY83giq%252BMtk%253D)

[Spring] Google Session Login카테고리 없음2023. 7. 31. 08:47
Table of Contents
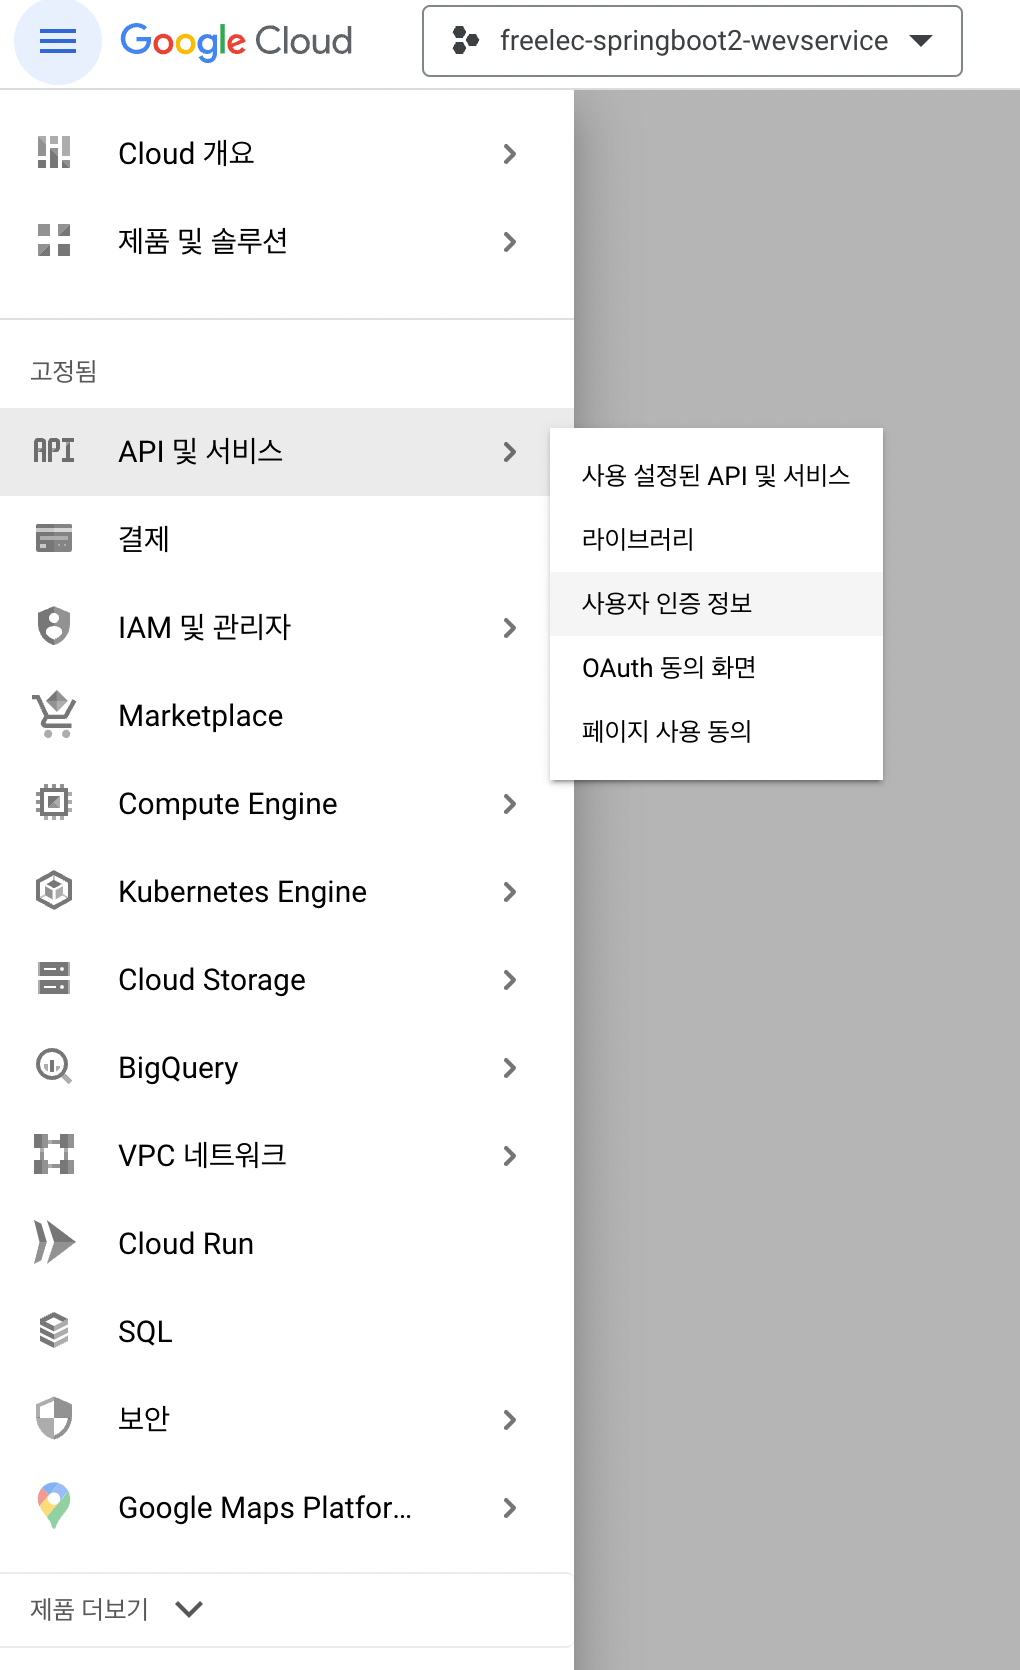
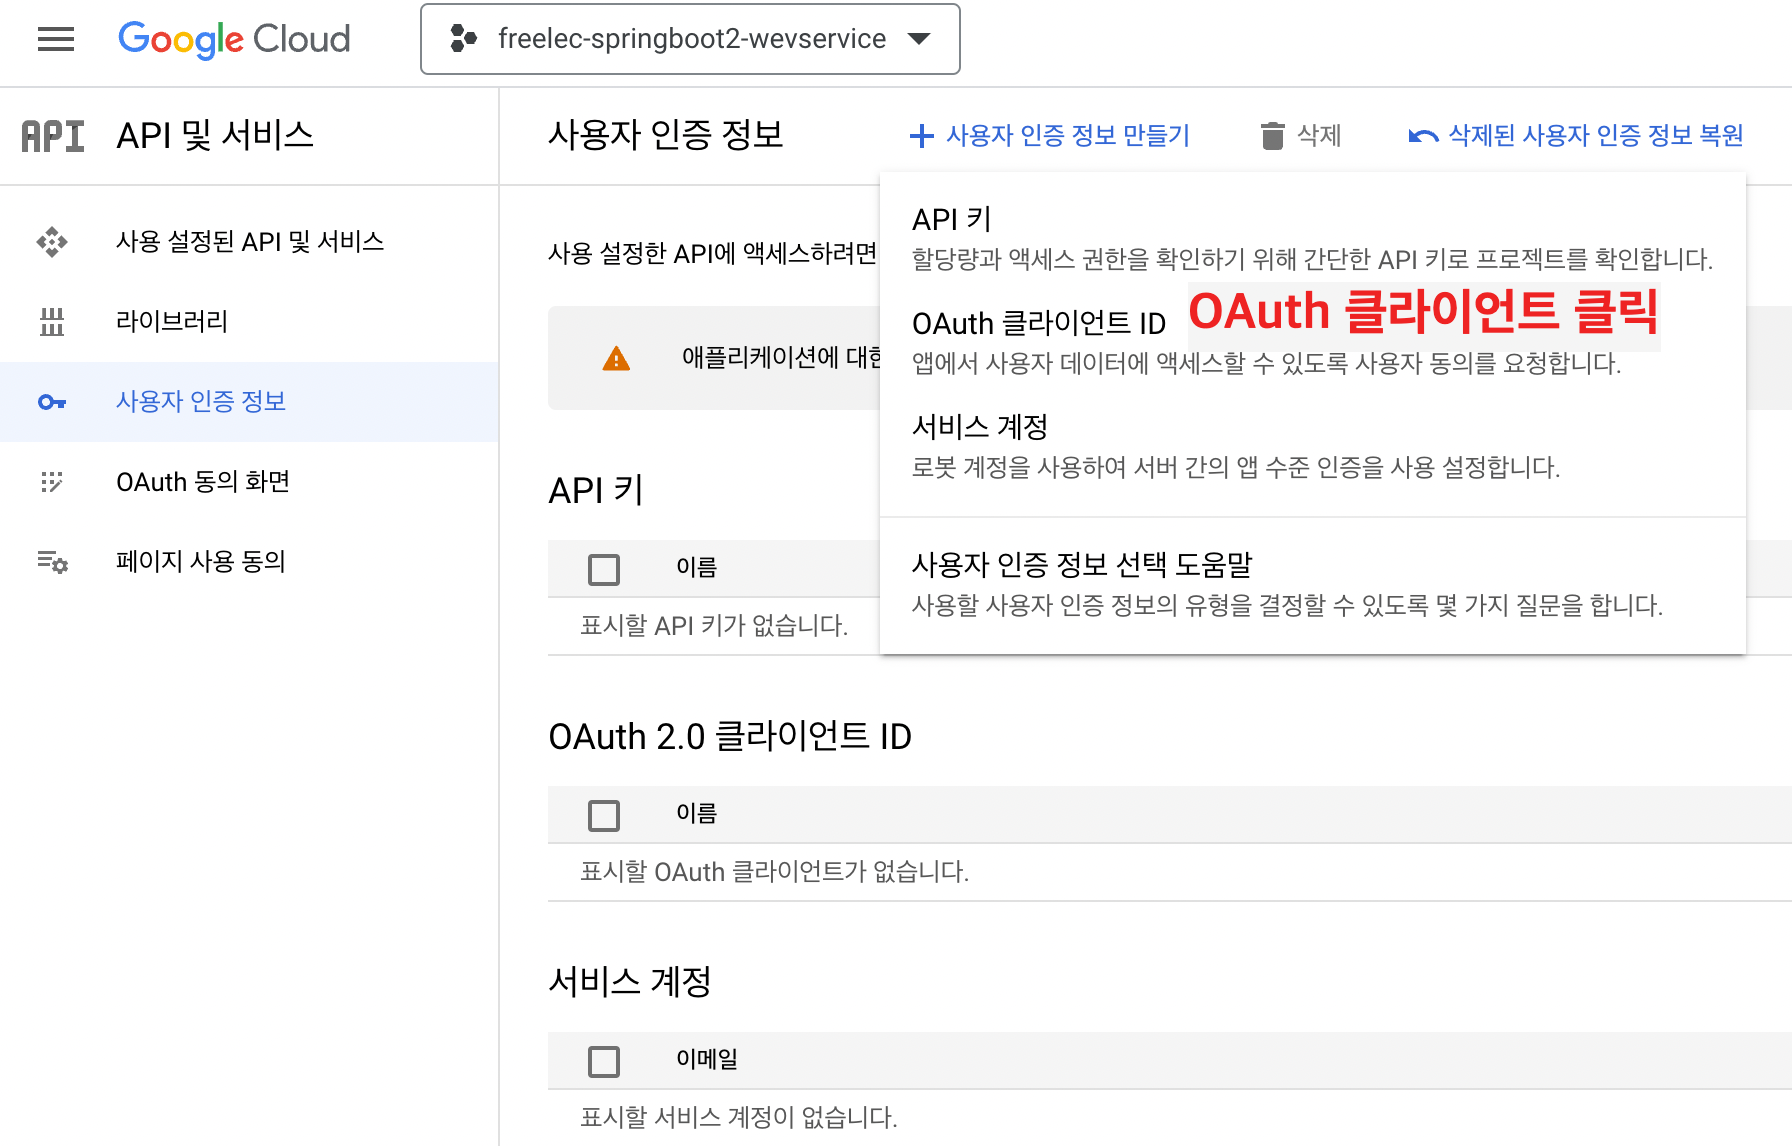
Google Cloud Platform 프로젝트 생성 및 설정


Spring
application-oauth.properties
spring.security.oauth2.client.registration.google.client-id={클라이언트 아이디}
spring.security.oauth2.client.registration.google.client-secret={시크릿 키}
spring.security.oauth2.client.registration.google.scope=profile, email


#scope는 디폴트가, profile, email, openid 인데 openid라는 scope가 있으면 OAuth2 provider로 인식하기 때문에 다른 소셜 로그인
#사용 시 각각의 Oauth2Service를 만들어야한다. -> 하나의 service만 구현하기 위해 scope를 지정

#spring boot에서 application-xxx.properties로 만들면 xxx라는 이름의 profile이 생성되어 이를 통해 관리할 수 있다.
#즉 profile=xxx라는 식으로 호출하면 해당 properties의 설정들을 가져올 수 있다.
application.properties
#oauth 파일의 설정들을 사용할 수 있다.
spring.profiles.include=oauth
Security Config
@RequiredArgsConstructor
@EnableWebSecurity  //spring security 설정들을 활성화 시켜줌
public class    SecurityConfig {
    private final CustomOauth2userService customOauth2userService;

    @Bean
    public SecurityFilterChain filterChain(HttpSecurity http) throws Exception {
        http.csrf().disable().headers().frameOptions().disable()    //h2-console 화면을 사용하기 위해 해당 옵션들을 disable
                .and()
                    .authorizeRequests()    //url 별 권한 설정 시작점 authorizeRequests()가 선언되어야만 antMatchers() 사용 가능
                    .antMatchers("/", "/css/**", "/images/**", "/js/**", "/h2-console/**")  //antMathchers로 URL, HTTP Method 별 권한 관리가 가능
                    .permitAll()
                .antMatchers("/api/v1/**").hasRole(Role.USER.name())    //post면서 해당 url에서 Role이 user인 사람만 가능
                    .anyRequest()   //설정된 url외의 url들
                    .authenticated()    //권한을 줌
                .and()
                    .logout()   //Oauth2 로그아웃 기능에 대한 여러 설정의 진입점
                    .logoutSuccessUrl("/")// 로그아웃 시 "/"로 이동
                .and()
                    .oauth2Login()  //Oauth2 로그인 기능에 대한 여러 설정의 진입점
                    .userInfoEndpoint() //Oauth2 로그인 성공 이후 사용자 정보를 가져올 때의 설정들을 담당한다.
                    .userService(customOauth2userService);
                    //소셜 로그인 성공 시 후속 조치를 진행할 userService 인터페이스의 구현체를 등록
                    //소셜 서비스에서 사용자 정보를 가져온 상태에서 추가로 진행하고자하는 기능을 명시할 수 있다.
        return http.build();
    }
}
CustomOAuth2userService
@RequiredArgsConstructor
@Service
public class CustomOauth2userService implements OAuth2UserService<OAuth2UserRequest, OAuth2User> {
    private final UserRepository userRepository;
    private final HttpSession httpSession;
    @Override
    public OAuth2User loadUser(OAuth2UserRequest userRequest) throws OAuth2AuthenticationException {
        OAuth2UserService delegete = new DefaultOAuth2UserService();
        OAuth2User oAuth2User = delegete.loadUser(userRequest);

        //현재 로그인 진행 중인 서비스를 구분하는 코드 (구글이냐 네이버냐)
        String registrationId = userRequest.getClientRegistration().getRegistrationId();
        //Oauth2 로그인 진행 시 키가 되는 필드값 = PK와 같은 의미 (구글은 기본적으로 코드를 지원하지만, 네이버 카카오 등은 기본으로 지원하지 않는다.) 구글 기본 코드 = "sub"
        String userNameAttributeName = userRequest.getClientRegistration().getProviderDetails().getUserInfoEndpoint().getUserNameAttributeName();
        //OAuth2User의 attributes
        OAuthAttributes attributes = OAuthAttributes.of(registrationId, userNameAttributeName, oAuth2User.getAttributes());

        User user = saveOrUpdate(attributes);
        //세션에 사용자 정보를 저장하기 위한 Dto 클래스
        httpSession.setAttribute("user", new SessionUser(user));

        return new DefaultOAuth2User(
                Collections.singleton(new
                        SimpleGrantedAuthority(user.getRoleKey())),
                attributes.getAttributes(),
                attributes.getNameAttributeKey());
    }

    private User saveOrUpdate(OAuthAttributes attributes){

        //소셜 서비스 사용자 정보가 업데이트 되었을 때를 대비해 update 기능도 같이 구현
        User user = userRepository.findByEmail(attributes.getEmail())
                .map(entity -> entity.update(attributes.getName(), attributes.getPicture())).orElse(attributes.toEntity());

        return userRepository.save(user);
    }
}
OAuthAttributes
@Getter
public class OAuthAttributes {
    private Map<String, Object> attributes;
    private String nameAttributeKey;
    private String name;
    private String email;
    private String picture;

    @Builder
    public OAuthAttributes(Map<String, Object> attributes, String nameAttributeKey, String name, String email, String picture) {
        this.attributes = attributes;
        this.nameAttributeKey = nameAttributeKey;
        this.name = name;
        this.email = email;
        this.picture = picture;
    }


    //OAuth2User에서 반환하는 사용자 정보는 Map이기 때문에 값 하나하나를 변환해야만 한다.
    public static OAuthAttributes of(String registrationId, String userNameAttributeName, Map<String, Object> attributes){
        return ofGoogle(userNameAttributeName, attributes);
    }

    private static OAuthAttributes ofGoogle(String userNameAttributeName, Map<String, Object> attributes){
        return OAuthAttributes.builder()
                .name((String) attributes.get("name"))
                .email((String) attributes.get("email"))
                .picture((String) attributes.get("picture"))
                .attributes(attributes)
                .nameAttributeKey(userNameAttributeName)
                .build();
    }

    public User toEntity(){
        return User.builder()
                .name(name)
                .email(email)
                .picture(picture)
                .role(Role.GUEST)   //가입할 때 기본 권한은 게스트
                .build();
    }
}
SessionUser
@Getter
public class SessionUser implements Serializable {
    //Session에는 인증된 사용자의 정보만 있으면 된다.
    private String name;
    private String email;
    private String picture;


    /*User 클래스가 아닌 Dto 클래스를 따로 만든 이유 -> 직렬화를 구현하지 않으면 type convert 에러가 발생하게 된다.
    * 이를 해결하기 위해 User class에 직렬화 코드를 넣는다면? -> Entity 클래스이기 때문에 언제 다른 관계가 형성될 지 모른다.
    * @ManyToOne, OneToMany 등 자식 엔티티를 갖고있다면 직렬화 대상에 자식들까지 포함되니 성능 이슈, 부수 효과가 발행할지도 모른다.
    * 그렇기 때문에 유지보수 측면에서 직렬화 기능을 가진 Session Dto 클래스를 만드는 것이 좋다.*/

    public SessionUser(User user) {
        this.name = user.getName();
        this.email = user.getEmail();
        this.picture = user.getPicture();
    }
}
@뽀글뽀글 개발자 :: 뽀글뽀글 개발 일지
포스팅이 좋았다면 "좋아요❤️" 또는 "구독👍🏻" 해주세요!